Modeling a 3D orc with Lightwave 3D
Chapter 8 - UV Mapping
page 1 of 5
Et voilà, we enter on the hottest chapter, UV Mapping! Or you love, or you hate it...Start selecting ears frontal polygons (we could do this on 4th chapter, i forgot it :P) and give them a new surface called "ears". Rotate the head 90° on the Y axis, with 0,0,0 center.
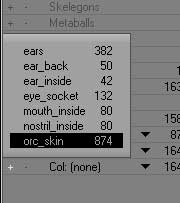
Open polygon statistics (w) and select polygons with "orc_skin" surface and click the "+". Now let's create the UV map, click the "T" on your bottom-right menu, then from the menu select (new); call the map "head" and choose a cylindrical map on the Y axis and this what you get.
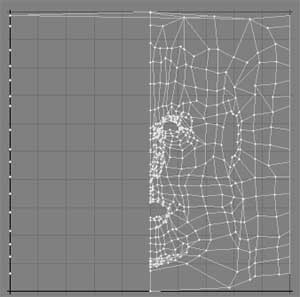
Now reset head position, rotating it againt but -90° on the Y axis, always 0,0,0 center. Now there are two ways, or you get an UV symmetry plugin you delete a half head and mirroring after adjusting it; i chose the 2nd way, something i can do with my default Lightwave without external plugins. Once deleted your favourite half, unweld your polygons with ctrl + u (this let you edit the cylindrical uv map) and temporary stretch and move your uv.
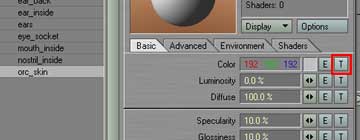
Now open surface editor (ctrl + F3), select the "ork_skin" material and add a color map. Select Prejection > UV, then UVMap > head and Image > Load image.